
IPFS 指纹 这是什么
[VPS][NginX]CloudPanel安裝篇
鑑於上篇的Webinoly後,這篇講解的是使用圖形化介面的CloudPanel
說實在命令列不是不好,就只是有時候對我來說還要去找相關指令,會不如圖形介面的直觀
所以在WordPress的社群中有其他前輩推薦這款圖形介面的面板,經過一輪使用下來,真的算是很容易上手且有相當功能的圖形面板
安裝方式真的很簡單
更新系統到最新狀態
安裝圖形介面腳本
結束…(對,就這樣而已)
目前CloudPanel支援的作業系統僅Ubuntu 24.04 LTS、Ubuntu 22.04 LTS、Debian 12 LTS、Debian 11 LTS這四個版本,其他版本的作業系統可就沒辦法了
Step 01:更新系統到最新狀態
接下來我這裡是以Ubuntu 24.04 LTS為例,首先來更新系統

輸入系統更新指令
apt update && apt -y upgrade && apt -y install curl wget sudoStep 02:安裝圖形介面腳本
接下來的腳本,我會建議到官方網站去找適合你的腳本
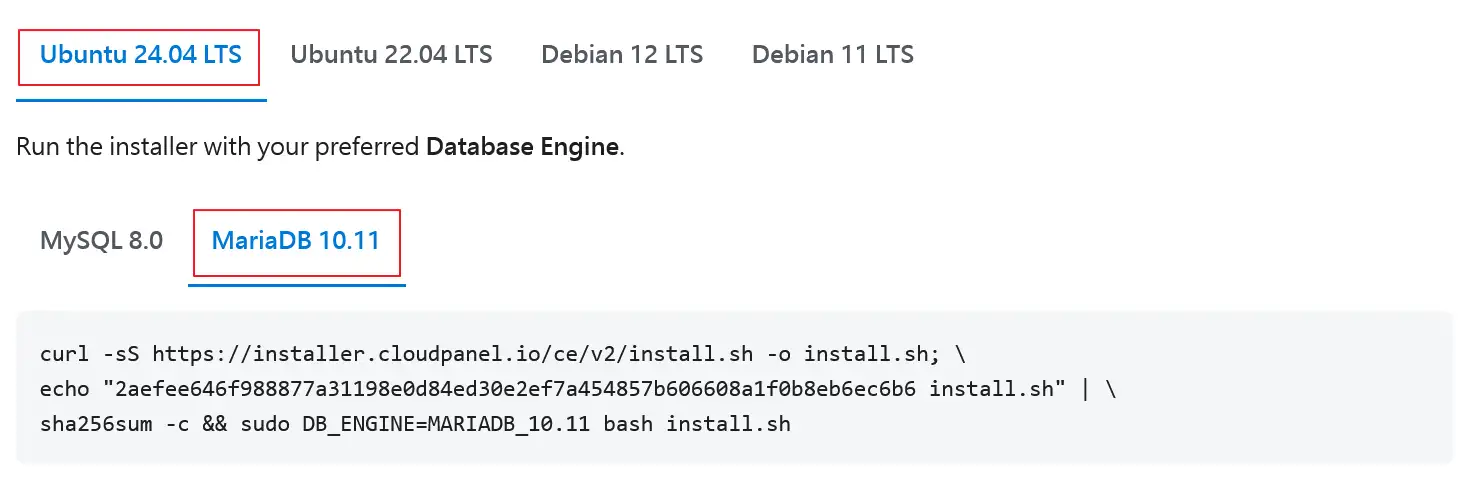
之所以會說去官方網站下載的原因是,系統不同、資料庫系統不同的狀況下,腳本的位置也會有些許的不同。而我這裡點選的是目前Ubuntu 最新的LTS版本,然後再搭配MariaDB的最新版本
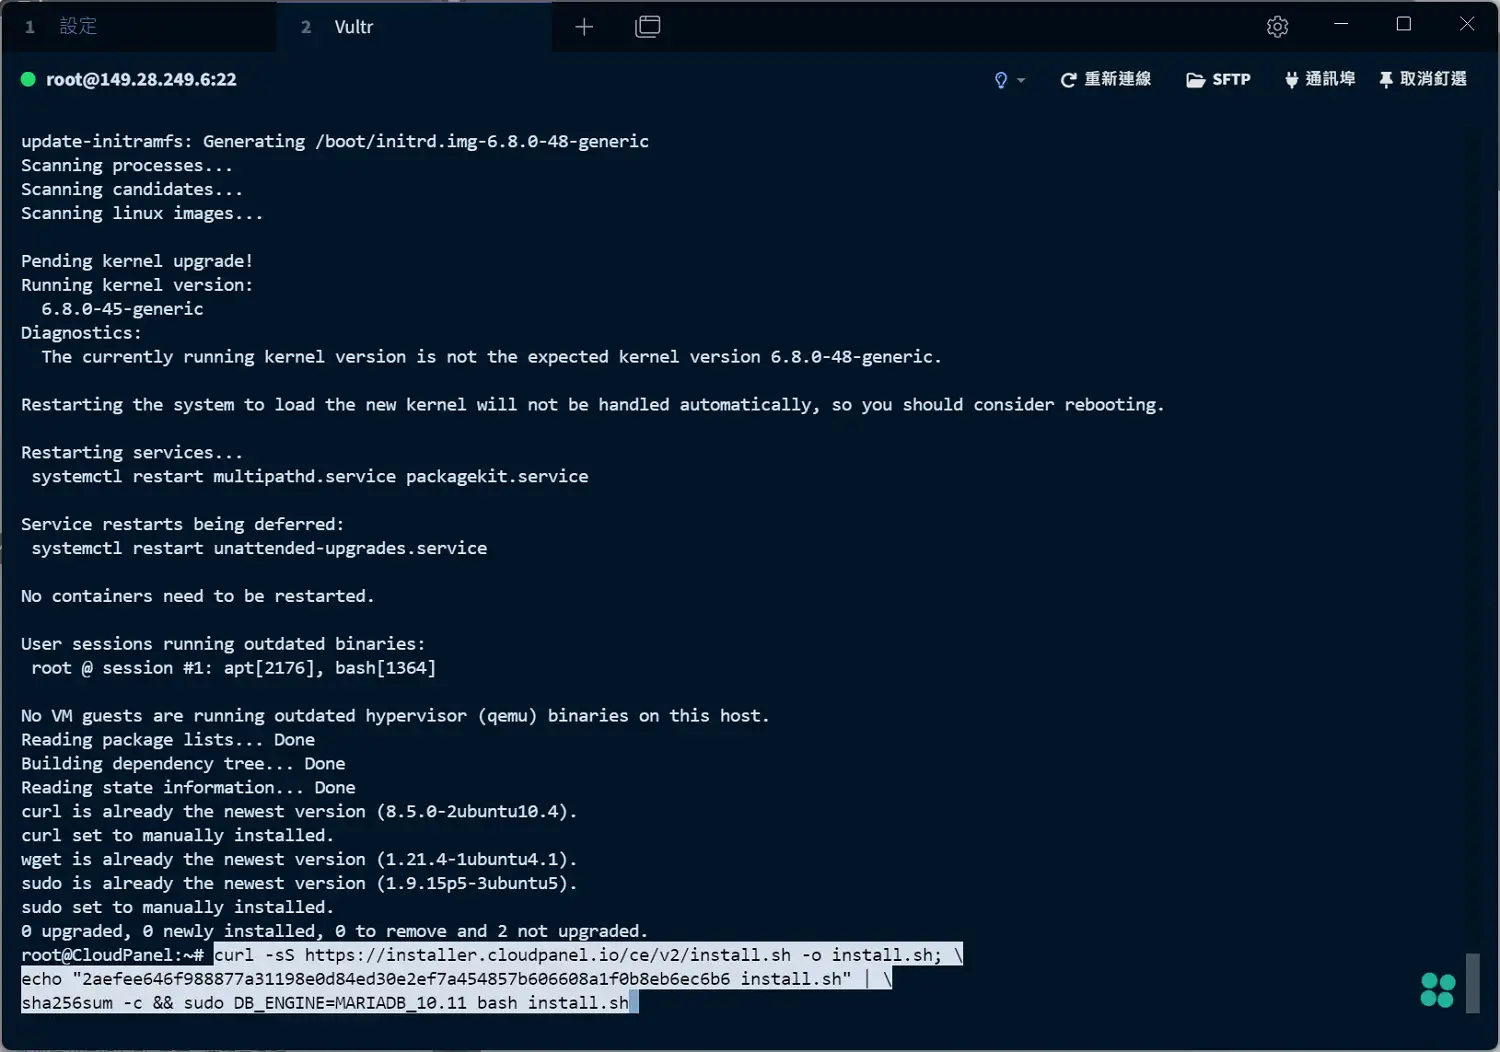
輸入安裝圖形介面的腳本
curl -sS https://installer.cloudpanel.io/ce/v2/install.sh -o install.sh; \
echo "2aefee646f988877a31198e0d84ed30e2ef7a454857b606608a1f0b8eb6ec6b6 install.sh" | \
sha256sum -c && sudo DB_ENGINE=MARIADB_10.11 bash install.sh
總之這時候可以稍微休息一下,因為都是自動安裝的
安裝結束

安裝結束,並且看到後台的登入地址
登入後台(以下為Firefox的操作)
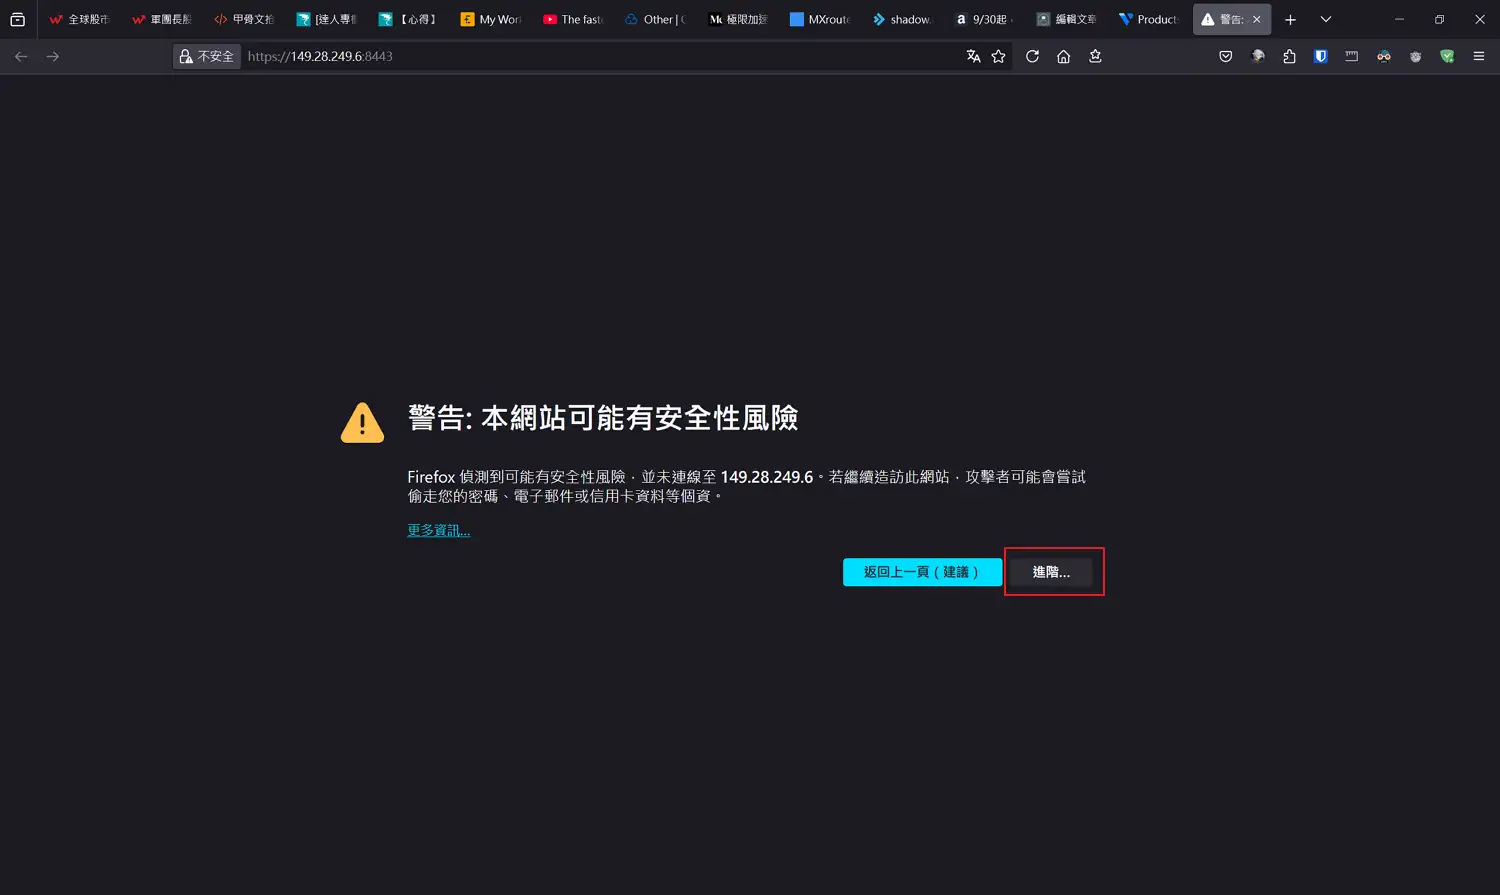
這時候會看到警告畫面,按下「進階」按鈕
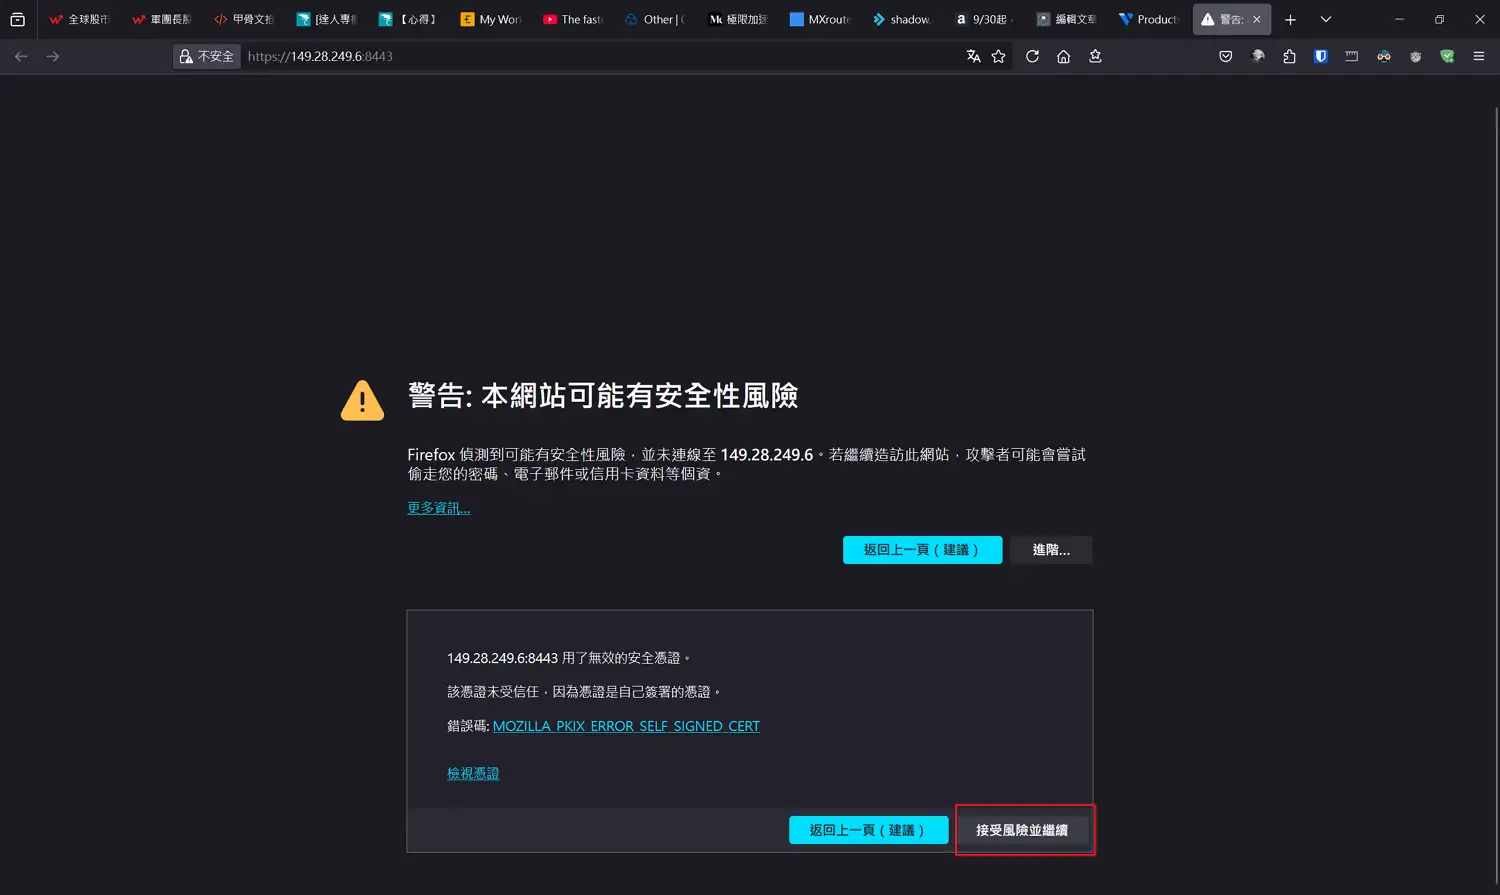
點選「接受風險並繼續」按鈕

畫面雖然是英文的,但下面有「Language」下拉式選單可以選擇臺灣的中文
調整成中文後便輸入要登入時的一些資訊,使用者名稱就是後台登入用的用戶名稱,密碼為後台登入用的密碼
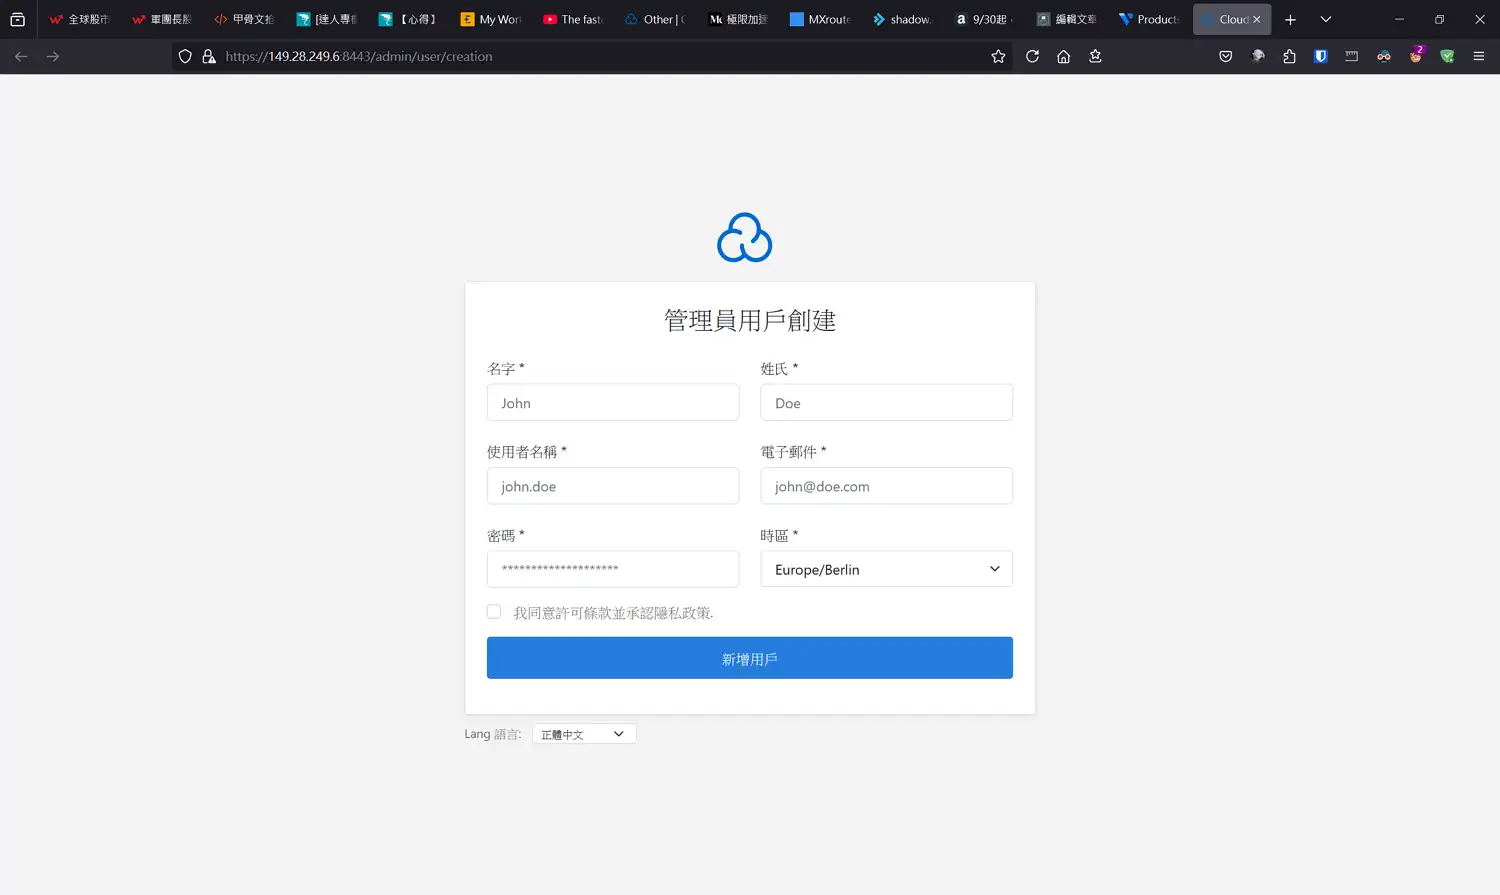
輸入要登入後台的相關資訊
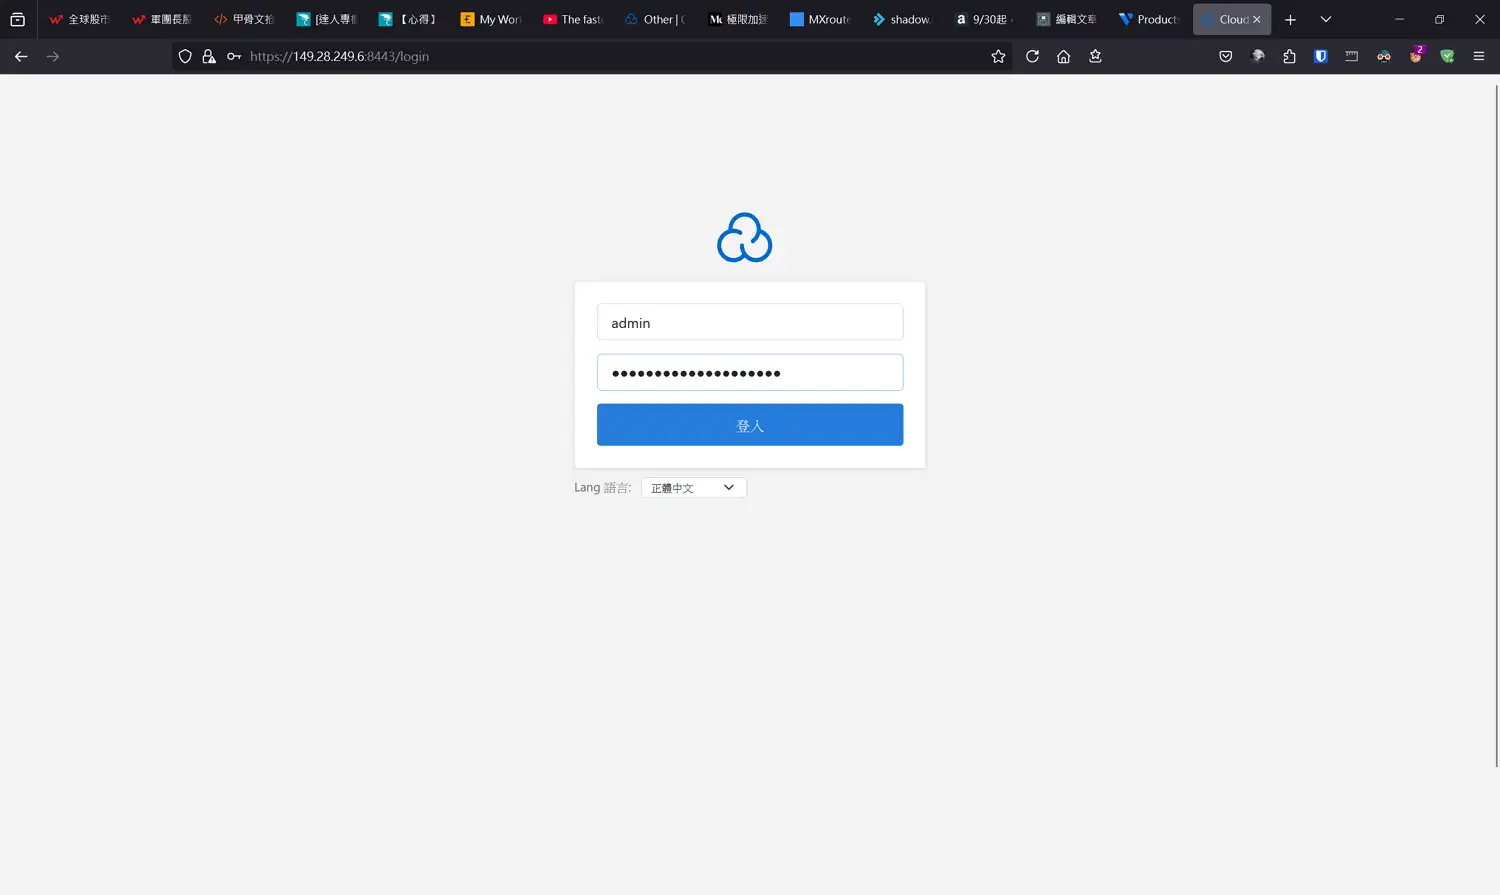
後台登入畫面,輸入剛才填入的用戶名稱以及密碼
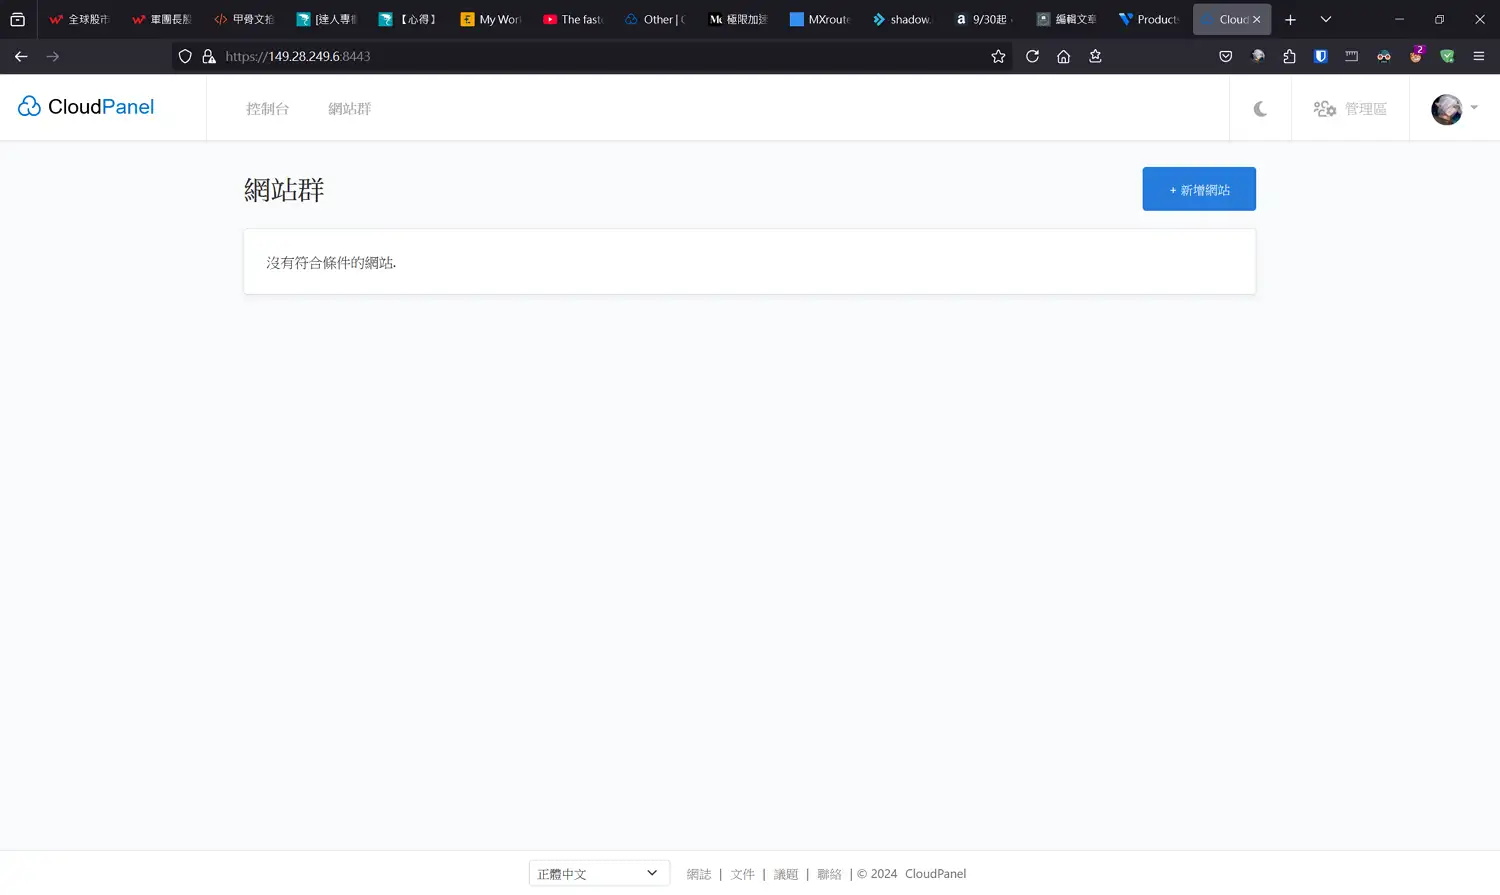
登入成功
這樣面板的部分就完成了,下篇再來介紹CloudPanel的相關設定
以上為[VPS][NginX]CloudPanel安裝篇,希望對你有所幫助