在 LINE Developers 上建立 LINE Bot
前言 & 概述
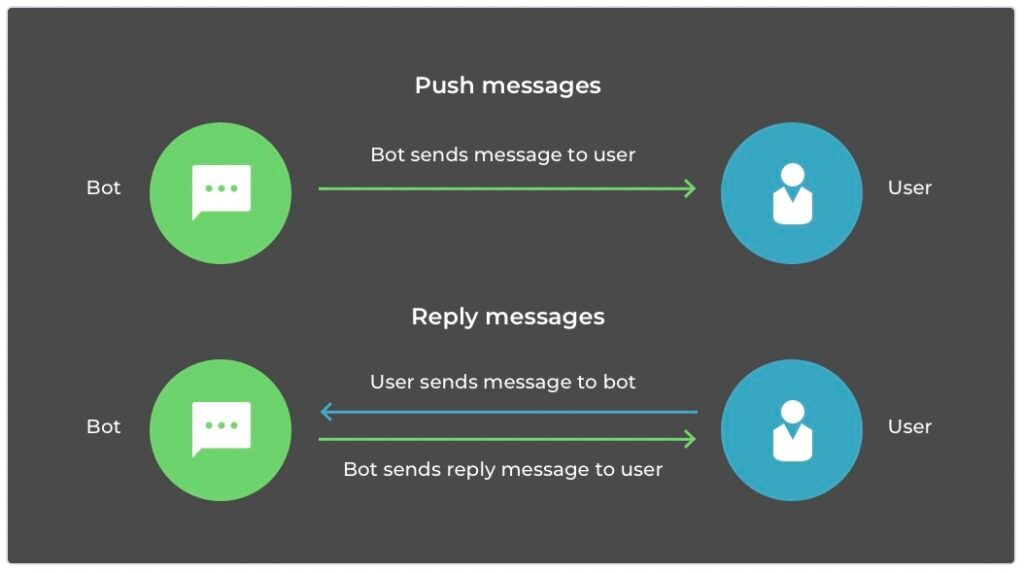
LINE 是一款在台灣相當受歡迎的社群 App,許多商家會透過「官方帳號」的服務,經營線上通路,與客戶保持緊密聯繫。「官方帳號」就像是 LINE 中的機器人一樣,可以自動回覆使用者的訊息,或是主動向使用者發送資訊。LINE Bot 的實現是基於 LINE Messaging API 技術。
在實際建立一個 LINE Bot 之前,我們需要對 LINE Messaging API 有初步的認識,並且註冊成為 LINE Developer 與建立 Channel。在本篇文章中,我們將會學習建立 LINE Bot 的前置作業。
LINE Messaging API 是什麼
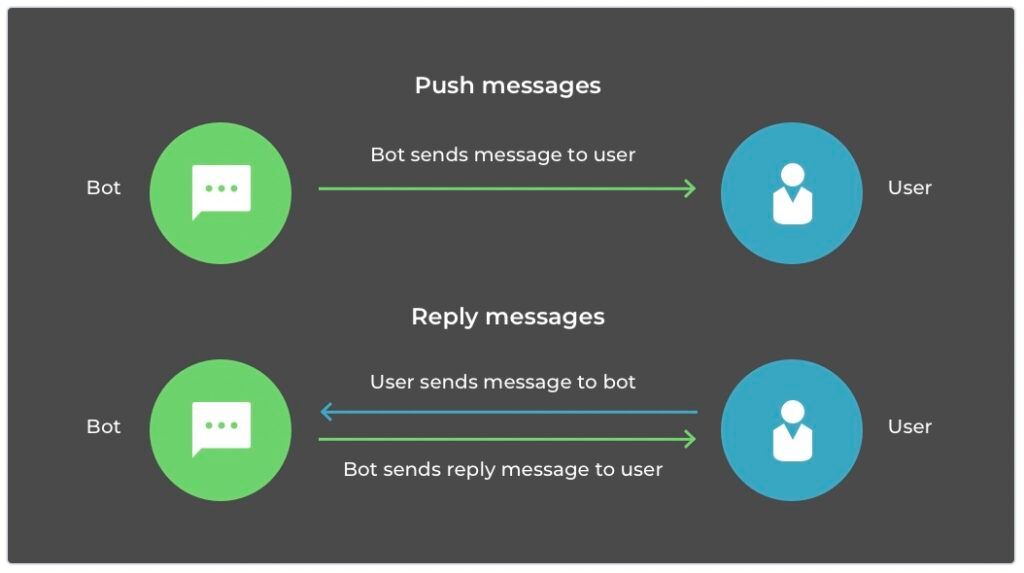
LINE Messaging API 是 LINE 提供給開發者訊息發送與回覆的技術。我們可以先在 LINE Developers 中建立 LINE Bot,並在應用程式中串接此 API,使得 LINE Bot 能夠自動回覆使用者或是主動向使用者發送訊息。想更深入的理解 LINE Messaging API 可以參考官方文件。
對於 LINE Messaging API 有初步的概念後,我們可以開始建立第一個 LINE Bot。在實際撰寫程式碼之前,我們需要申請 LINE Developers 帳號,並在上面新增一個 Channel。以下教學 (Step 1 ~ Step4) 中,將參考 LINE 官方教學。
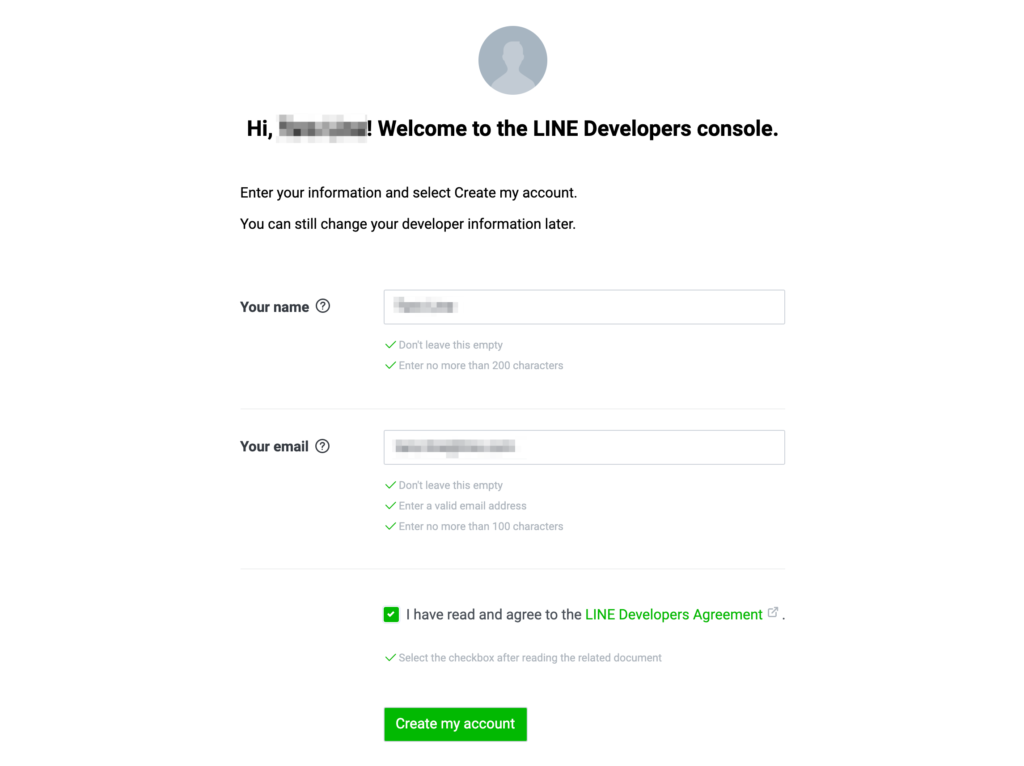
Step 1:申請 LINE Developers 帳號
首先,我們需要先到 LINE Developers 網站申請一個帳號或是透過 LINE 帳號登入。 第一次登入 LINE Developers Console 時,需要先輸入一些基本資訊。
Step 2:建立 Provider
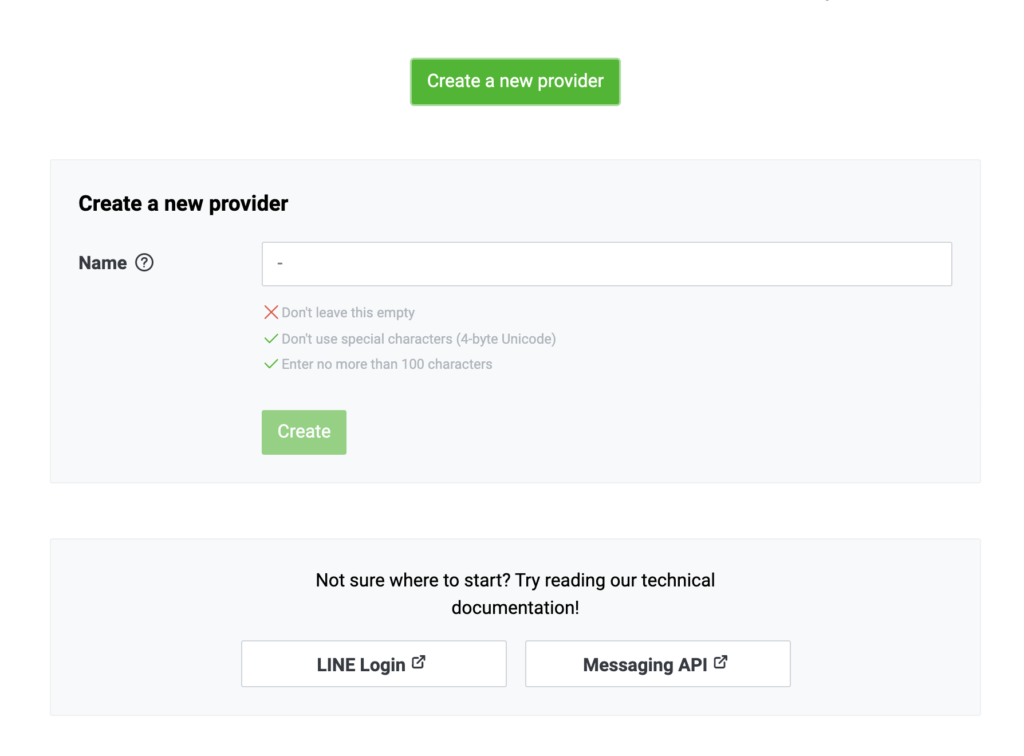
接著,建立新的 Provider,我們需要輸入 Provider 名稱。Provider 指的是提供服務的主體,可以是你的名字或是公司名稱。
Step 3:建立 Channel
接著,建立 Channel 並選擇 Messaging API,這個 Channel 可以想成是我們的 LINE Bot。其中,Channel icon 與 Channel name 將會出現在 LINE App 中,代表這一個 LINE Bot。
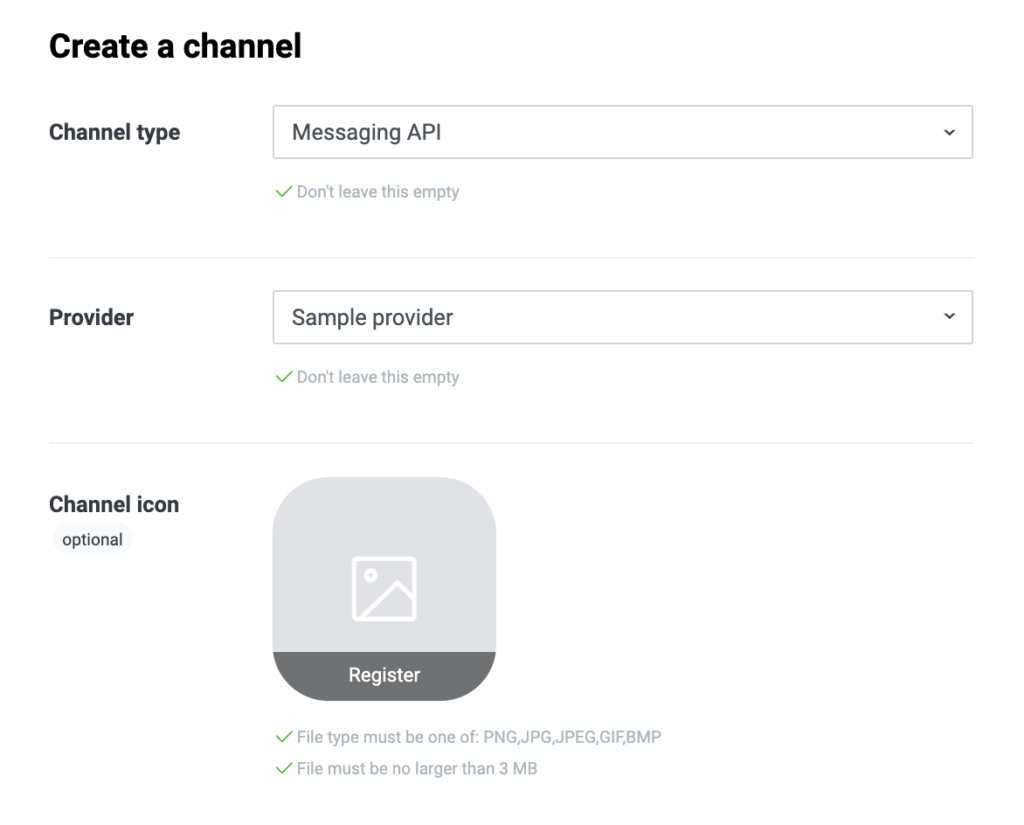
Step 4:Channel 建立完成
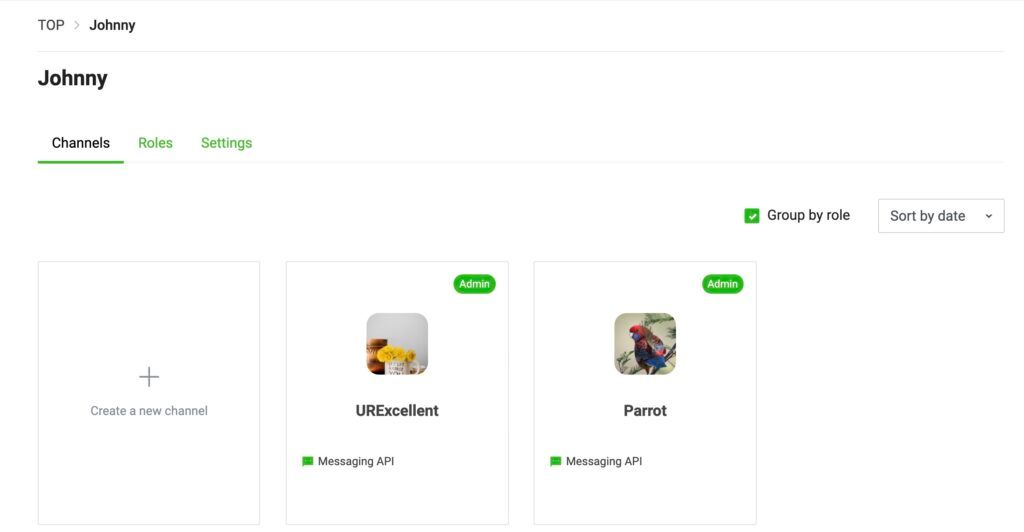
Channel 建立完成後,將可以在 Console 頁面中,看到我們已經建立好的 Channel。(下圖中,我已經建立過兩個 Channel)
Step 5:修改 LINE Bot 初始設定
接著,點擊我們剛剛建立的 Channel,可以對這個 Channel (LINE Bot) 進行設定。首先,選擇 Messaging API。

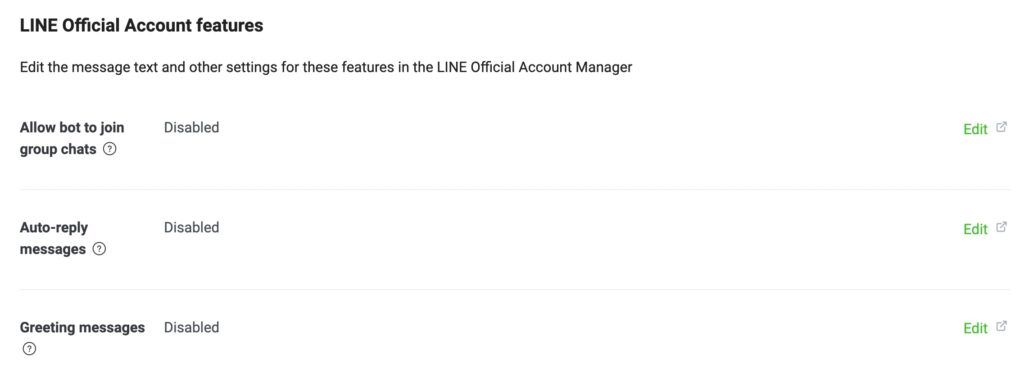
並滑到頁面最下方,在 Allow bot to join group chats 的欄位中,點選 Edit。
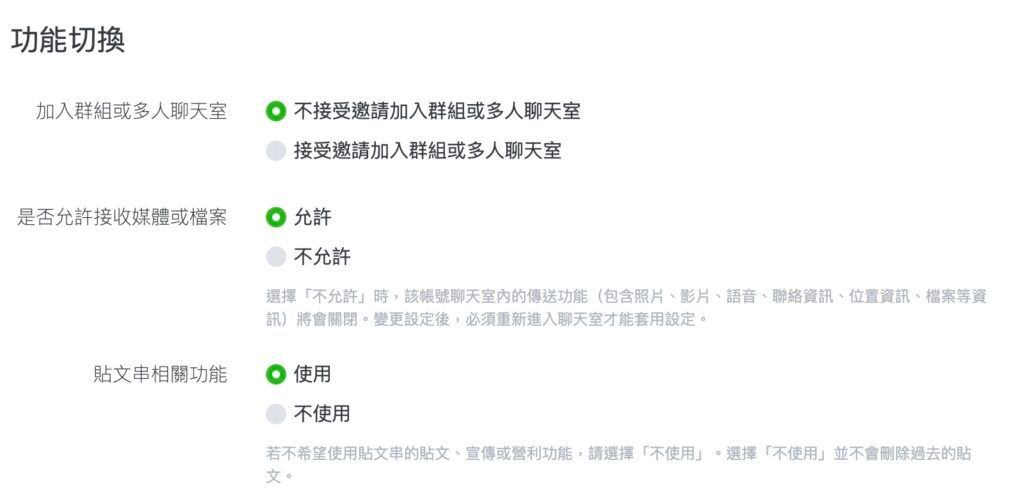
來到新頁面後,在「功能切換」的區塊中,「不接受」LINE Bot 被邀請進入多人群組。
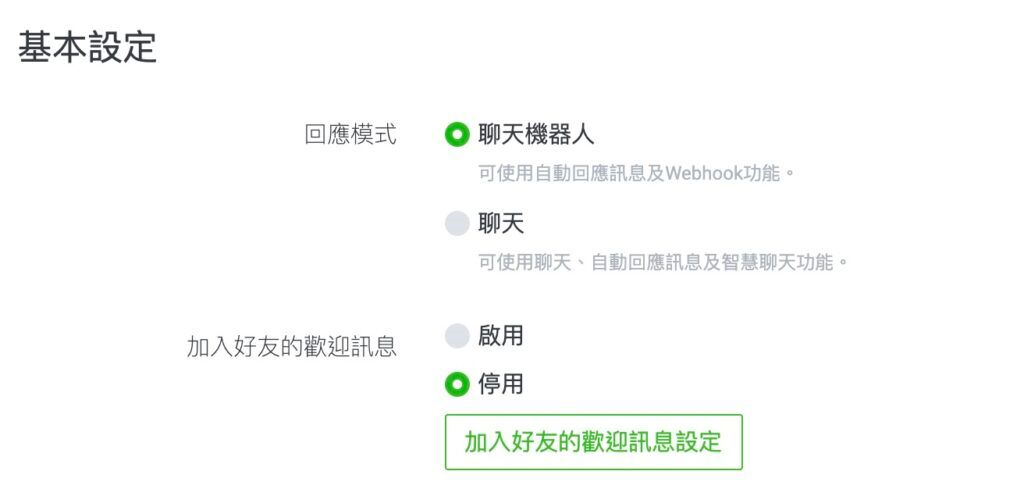
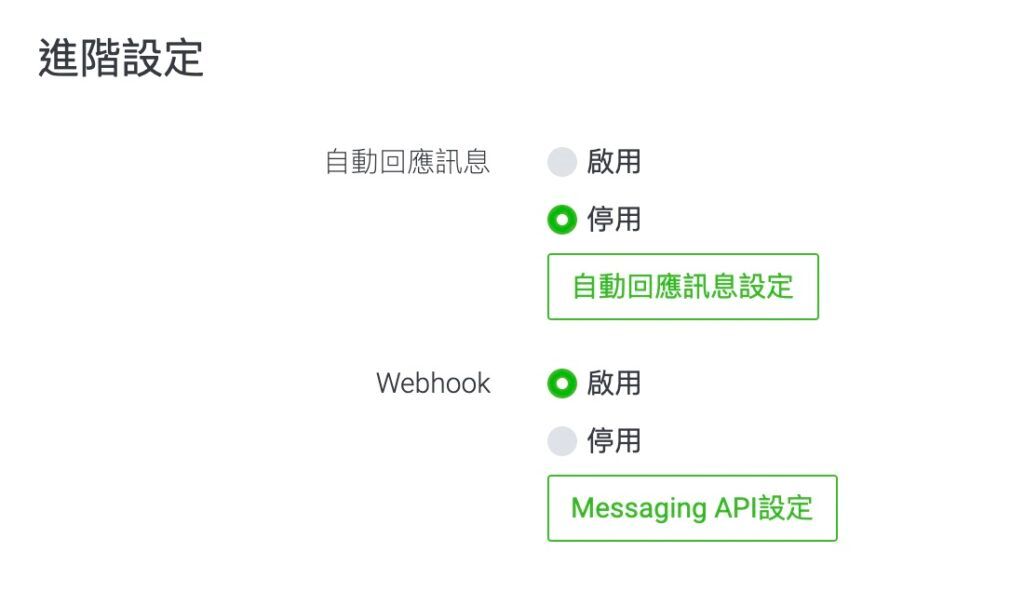
接著,回到原來的頁面中,在 Auto-reply messags 欄位中,點選 Edit。到新的頁面中,將會看到針對這個 LINE Bot 進行「基本設定」與「進階設定」兩大區塊。
在「基本設定」中,「回應模式」選擇「聊天機器人」;「加入好友的歡迎訊息」選擇「停用」。
在「進階設定」中,「自動回應訊息」選擇「停用」;「Webhook」選擇「啟用」。
Step 6:加入 LINE Bot 作為好友
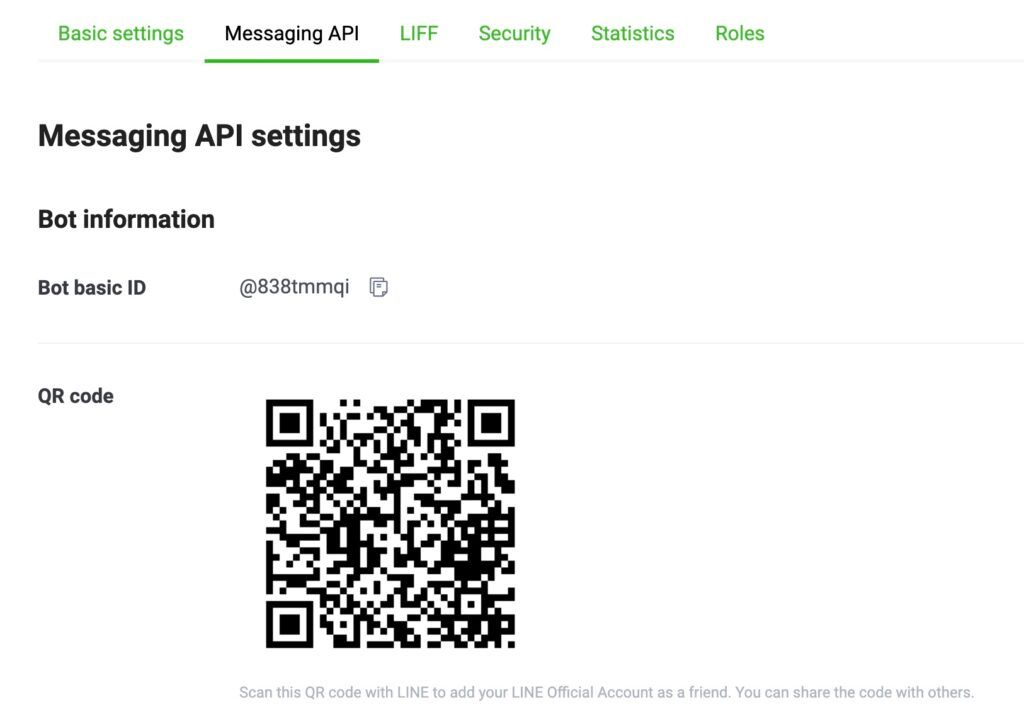
完成對 LINE Bot 的基本設定後,我們可以在頁面中找到這個 LINE Bot 的 QR Code。透過手機掃描這個 QR Code 就可以自動開啟 LINE App 並將我們剛剛建立好的 LINE Bot 加為好友。
當你試著傳訊息給 LINE Bot 時,如果發現他「已讀」了,就表示我們的訊息已經被成功的傳送到 LINE Platform 上。接下來,我們就可以開始撰寫程式碼,接收使用者向 LINE Bot 傳送的訊息,並回覆相對應的訊息給使用者。
結語
在本篇文章中,我們學習了如何在 LINE Developers 上建立 LINE Bot,並進行一些設定。也對於 LINE Messaging API 有初步的認識。完成了 LINE Bot 的基本設定後,我們將可以開始善用 Messaging API,依照服務的目的,打造不同的 LINE Bot。
